
Plenty of dual-monitor set-up advice amounts to “put two screens on a stand and you are done.” We think that view is incomplete. A good setup depends on more than spec-sheet figures. Panels, mounts, cabling, and window management must hold up over a full day. Mismatched pixel density and unequal refresh rates cause more friction than you might expect. Cables with limited bandwidth make it worse.
This guide covers the technical side of a seamless dual-monitor experience. A second screen alone is not enough. We cover resolution scaling, panel technology, and cable bandwidth limits. We also cover ergonomics that reduce neck and eye strain. Then we look at why manual window management breaks down over time. We also look at software that fixes it.
What Makes the Best Dual Monitor Setup Work Well
A good dual monitor arrangement accounts for pixel density, not just screen size or resolution. Physical geometry matters too. How the two screens sit relative to each other and to your line of sight makes a significant difference. Get it right, and the setup feels natural. Get it wrong, and you adjust constantly through the day.
Match Pixel Density, Not Just Resolution
Pixel density (PPI) is the diagonal resolution divided by the screen’s diagonal size in inches. Two monitors can share a resolution label and still look mismatched:
- A 27-inch 1440p monitor runs about 109 PPI
- A 24-inch 1440p monitor runs about 122 PPI
- A 24-inch 1080p monitor runs about 92 PPI
- A 32-inch 4K monitor runs about 137 PPI
Why This Matters More at Close Range
Pixel density differences become more noticeable the closer you sit to your screens. At typical desk viewing distances of 20 to 28 inches, most people can see a PPI gap of 15 or more between two monitors. It shows most in text-heavy work like code or spreadsheets.
Choose a Mount Rated for Your Panel Weight
Careful alignment is pointless if the arm or stand cannot bear the monitor’s weight. It will eventually sag, drift from its position, or lose its height setting.
VESA Pattern Sizes
Most monitors follow one of two standard mounting patterns. Lighter panels, typically under 24 inches, use 75×75 mm. Larger ones use 100×100 mm. Do not assume a generic arm fits an ultrawide or large 4K model. Some use non-standard or dual-pattern mounts. The manual has the answer.
Load Rating Checks
The maximum load rating in kilograms that an arm puts on paper is not something to ignore. A 27-inch 4K can put more than 6kg on it, while a big curved or ultrawide panel may top 9kg. Check the arm’s capacity against the monitor’s weight plus any extras, such as a light bar or webcam mount. Do this before you install it.
Calibrate Brightness and White Point
Two panels with the same 0 to 100 brightness scale may still look different. Manufacturers calibrate that scale inconsistently between models and even between production runs of the same model. The result is a visible difference.
For instance, put a 250-nit panel next to a 350-nit panel and set both to 50%. On paper the settings match. In practice the brightness does not. This mismatch often makes a supposedly matched dual setup look uneven.
To get around it, do not rely on the on-screen percentage for brightness but rather match the nits. Set both screens to the same white point, usually 6500K for standard use. If your work demands color accuracy, use a hardware colorimeter, because visual matching can mislead. After any driver or firmware update, recheck your calibration. Some updates wipe out custom profiles.
Picking the Best Monitors for Dual Setup
Panel technology and connectivity drive most of the real-world differences between monitors that look similar on a spec sheet. In daily use, they behave very differently.
Panel Technology: IPS vs. VA
- IPS panels deliver roughly 178-degree viewing angles with minimal color shift, which matters when a second monitor sits at an angle to your line of sight
- VA panels offer higher static contrast, often 3000:1 versus IPS’s typical 1000:1, but shift color and brightness noticeably past about 30 degrees off-centre
- OLED panels, increasingly common in higher-end monitors, offer near-instant response times and true black levels but carry a higher risk of static-image burn-in, which matters if you keep a taskbar or sidebar visible for long stretches
The off-angle shift on VA panels is a real issue in a side-by-side layout. One monitor is rarely dead-center in your field of view. If your secondary monitor sits at a 20-to-30-degree angle, an IPS panel holds color better than a VA panel.
Connectivity and Bandwidth Limits
Cable and port standards have a bandwidth ceiling that catches many people off guard. This is especially true when they reuse older cables from a previous setup.
DisplayPort vs. HDMI
- DisplayPort 1.4 supports up to 4K at 120 Hz or 1440p at 165 Hz+ with DSC (Display Stream Compression) enabled
- DisplayPort 2.1 raises that ceiling further, supporting 4K at 240 Hz or higher on newer GPUs and monitors
- HDMI 2.0 caps out around 4K at 60Hz
- HDMI 2.1 closes much of that gap, supporting 4K at 120 Hz, but requires both the monitor and the cable to be rated for it
If you chain a high refresh rate 1440p monitor through an older HDMI port or an HDMI 1.4 cable pulled from a drawer, you will not get the panel’s rated performance, regardless of what the monitor is capable of on paper.
USB-C with Power Delivery
USB-C monitors with DisplayPort Alt Mode can carry video, data, and power delivery, commonly up to 90W or 100W, over a single cable. That’s a genuine reduction in cable clutter, since it replaces three separate cables with one, and it can also charge a laptop while driving the display, which is relevant for anyone docking a laptop daily.
Cable and Port Checklist
Before buying, confirm:
- Your GPU’s output port version matches the monitor’s input spec, not just the port shape
- The cable itself is rated for your target resolution and refresh rate, since a DisplayPort cable that looks identical to another may only support a lower bandwidth tier
- You have enough ports for future expansion if you plan to add a third display
- Your GPU can drive two high-refresh displays simultaneously, since some budget and integrated GPUs share bandwidth across outputs
Building the Best Dual Monitor Setup for Gaming
When you set up a dual monitor for gaming, your priorities differ from those for productivity. In this case, it is latency and motion clarity that take precedence over things like color fidelity or viewing angle.
Refresh Rate vs. Response Time
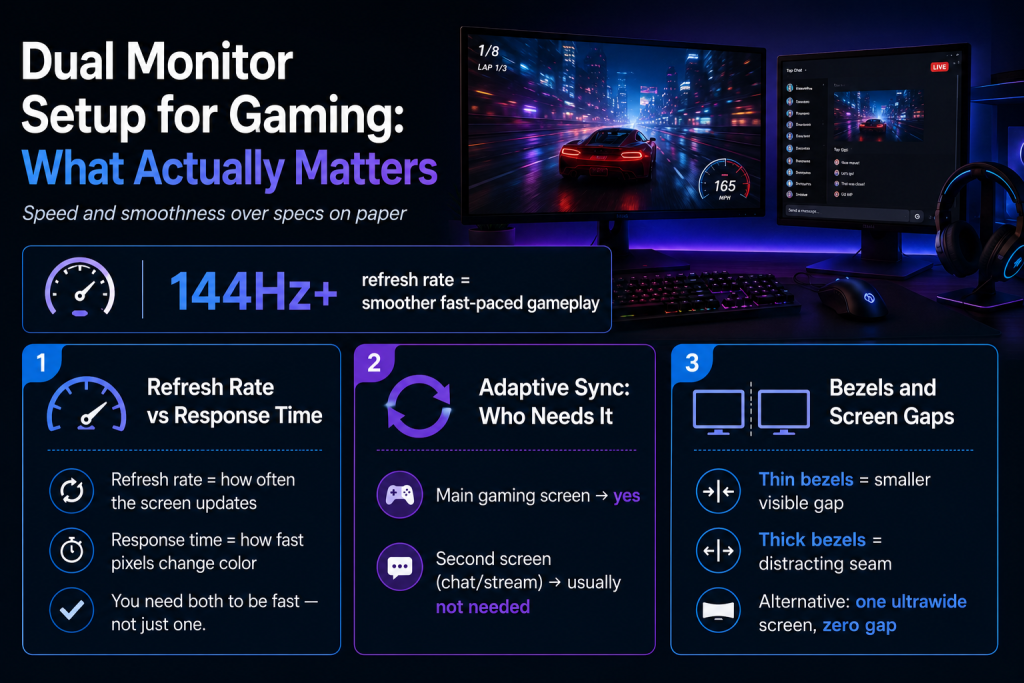
One must distinguish between the two. Refresh rate (Hz) tells you how often the panel redraws in each second. Then there is response time (ms), which is the speed of a pixel’s transition from one color to another, typically on a gray-to-gray (GtG) basis.
Do not be swayed by a high refresh rate alone; a 165Hz panel with an 8ms response time will still have its share of motion blur. It is best to look at both figures. For the most part, competitive shooters are better served by 144Hz or more with a sub-3ms GtG, whereas with less demanding games you will find little advantage in going beyond 120Hz.
Adaptive Sync: When You Need It
With adaptive sync, whether FreeSync or G-Sync, you avoid screen tearing because the display refresh rate matches what the GPU is outputting, typically within a 48 to 144 Hz range. This is an advantage your main gaming rig will make use of, particularly when you are into competitive or fast-moving games. There is no point in spending the extra on a secondary screen for a stream overlay or chat window; it does not require such features. Do make sure the monitor you are looking at is compatible with your GPU’s brand of sync standard, however. Some panels will only take one or the other and lack any form of certified crossover.
Bezel Width and Visual Continuity
In a dual configuration, the width of the bezel is as much a practical concern as it is a matter of looks. Put a 15mm bezel up against a 5mm one, and the resulting gap between them is quite noticeable; in the middle of a game, that space will be right in your peripheral vision.
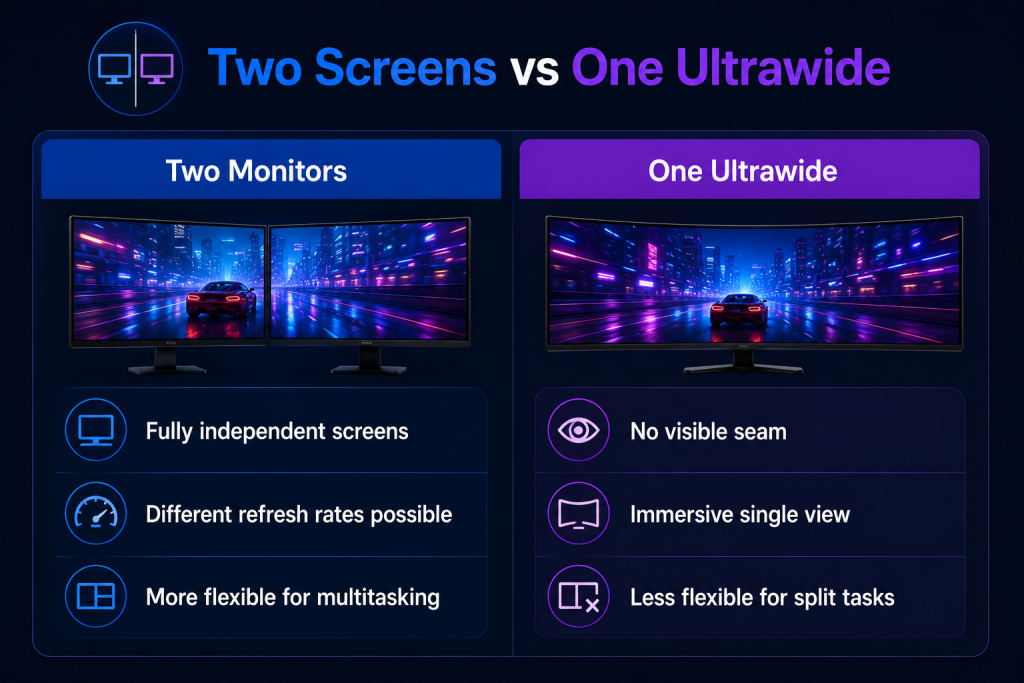
Then there is the question of side-by-side versus an ultrawide. An ultrawide panel is the solution for those who find the seam of a dual setup distracting during fast-paced activities, as it eliminates the gap entirely. The trade-off is that you forgo the flexibility of true independent displays. An ultrawide cannot match what a pair of monitors can do in terms of running separate inputs, refresh rates, and resolutions on their own, unless one resorts to picture-by-picture mode to divide the screen.
What to Check for the Best Monitors for Dual Monitor Setup Options
There are a handful of technical points that go beyond what you will find on the spec sheet or in most buying guides. These are the things that separate a setup from one that is an everyday nuisance.
Stand and Ergonomics
Don’t settle for just “adjustable” when it comes to the stand; check the height adjustment range in millimeters. If there is any thought of angling a secondary monitor, verify the tilt, swivel, and pivot. A reasonable rule of thumb is to measure your desk depth first: 20 to 28 inches is the proper distance for your eyes from the screen, and bigger panels require that kind of clearance. For those with a deep desk or who want to put screens in closer proximity than the stock stands will permit, take the reach of a monitor arm into account.
Panel Uniformity and Warranty
Then there is the matter of panel uniformity. This is more of a manufacturing variable than a design specification. You can have two of the same models and still find color variance or some backlight bleed on the individual unit, which is a common enough occurrence with VA panels at the lower end of the price scale. It is all down to tolerances in the factory that change from one batch to the next.
Keeping Your Layout Organized Across Multiple Screens
The hardware is only part of the equation. What remains is the matter of app windows and ensuring they stay where they should be on all your screens, day in and day out. One would rather not have to drag them back into position by hand after a reboot or a driver update has reset the display.
Why Manual Window Management Breaks Down
Then there is the issue with Windows’ own Snap Layouts. It recalls a grid but cannot tell which browser tabs or applications belong in each one. After an update or simply undocking the laptop to put it on another monitor, the grid is gone; you must put it back together. If you are moving between a desk with a dock and the laptop itself, that kind of reconstruction is a weekly occurrence. Over the course of a month, it is time well and truly lost.
What to Look for in Layout Management Software
If you’re evaluating tools to solve this, look for:
- Layout memory that saves exact window position, size, and monitor assignment, not just a grid template
- Profile switching for different workflows, such as writing, gaming, or video calls
- Automatic detection when your monitor configuration changes, so layouts adjust instead of scattering
- Multi-display scaling, since a tool built for two screens may not hold up if you add a third or fourth later
- Tab-level memory for browsers, since restoring window position without restoring open tabs still leaves manual cleanup
SmartPanels is an example of a tool that handles this sort of thing. With a single click, it can restore a profile across up to six displays, remembering everything from window dimensions to open tabs. It is a far more involved process than a grid-snap function, tracking individual applications and tabs instead of merely the screen real estate.
Frequently Asked Questions About the Best Dual Monitor Setup
Do both monitors need to be the same brand?
The brand is less important than matching resolution and pixel density for a more uniform look.
Is a curved monitor better for a dual screen setup?
As for curved panels, they are meant to be an ultrawide screen that wraps around your field of view. Put two next to each other, and the curve will work against you at the seam, creating an angle mismatch and a gap.
How much desk space does a dual monitor setup need?
When setting up a pair of 27-inch monitors on arms, allow some room for the clamp base and to route the cables; figure on about 48 to 50 inches of desk width to accommodate them.
Does adaptive sync matter for both monitors, or just one?
For the most part, FreeSync or G-Sync is only a consideration for the primary display. You typically don’t need it on a secondary monitor that you use for a stream overlay, some notes, or chat.
Does a dual monitor setup slow down my computer?
In nearly every instance the answer is no. Any recent GPU can handle dual 4K output without noticeable performance loss, even integrated ones; only demanding rendering tasks might reveal a difference.
Can I mix a 60Hz monitor with a 144Hz monitor?
As for running different refresh rates, the GPU is quite capable of driving each display on its own terms. It is best to put your more demanding, fast-moving content on the higher refresh panel, though, to keep things as smooth as possible.
Do I need the same panel technology on both monitors?
Not strictly, but mixing IPS and VA panels usually creates a visible contrast and color difference, especially at an angle, which some people find more distracting than a pixel density mismatch.
Is DisplayPort always better than HDMI for a dual setup?
In most cases, the answer is yes for higher-end resolutions and refresh rates, as DisplayPort 1.4 and 2.1 have greater bandwidth than HDMI 2.0. That said, if your cable and monitor can handle it, an HDMI 2.1 will reduce that difference significantly.
How do I know if my monitor arm can hold both my monitors?
When it comes to the arm, be sure to compare its maximum load rating in kg with the weight of the monitor as listed by the maker, considering any add-ons such as a light bar or webcam. One should bear in mind that a single-arm mount’s rating is typically per unit rather than a combined total.
Why does my secondary monitor appear dimmer even when both are set to the same brightness level?
As for brightness, do not rely on the percentage figure since there is no standard from one manufacturer to the next; two screens set to 50% may put out quite different nit levels. For accuracy, it’s better to match them by nits.
Where Most Setups Actually Fall Short
A best dual monitor setup really comes down to a few simple checks. Match your screen size and resolution. Pick a stand that can actually hold your monitors. Match brightness and color across both screens. Use cables that support the speed you want.
Most dual-monitor frustration doesn’t come from one big mistake. It comes from small mismatches, like uneven brightness or a cable that limits your refresh rate. These issues rarely show up when comparing spec sheets.
Once your hardware is sorted, the last step is keeping your layout organized. Good software should remember your setup and restore it automatically, so you’re not rebuilding your workspace every time you sit down.